2015年12月27日星期日

Notes of the high and low temperature alternating humidity temperature test chamber

1.When the cabinets temperature≥55℃,please don’t open the refrigeration compressor  in order to ensure normal operation of the compressor long life.
2.When the cooling function of the product to handing,the inclination shall not exceed 45℃ after in placeyou should put 1_2 days and then boot,it is make for normal operation and prolong life of the refrigeration system.
3.In order to ensure the safety of  equipment and testing,please install an external protective earthing, according to the requirement to supply power.
4. High and low temperature alternating temperature humidity test chamber prohibited test of the flammable ,explosive,poisonous, and highly corrosive product.
5. Non-professionals may not disassemble, repair.
6. The device should be grounded.

7.High and low temperature alternating temperature humidity test chamber have not explosive devices,please don’t put on the inflammable , explosive and drying items.
8.When you operate testing,please don’t open the cabinet door, it may cause personal injury and equipment malfunction.
9.The door lock can only be opened from the outside, if you want to into the tank must be someone guardianship.
10.If the chamber into the heating sample,the sample is using external power,please don’t  directly use equipment itself power.

11.The apparatus is provided with a variety of protective measures, please regularly check.
12.Never gravity opening / closing door products, otherwise easily lead to the door fall off, causing damage to the product, resulting in injury.
13.When to stop using the product for a long time, should regularly do get rid of the moisture treatment, to avoid damage on the device.
14.When you carry high and low temperature test chamber , should be careful to avoid panel the instruments such as consumable. 

2015年12月20日星期日

Colorimeter is analyze theory

Colorimeter for color control process to detect the color can be divided into two parts, one is the color detection, and the other part is the color analysis. Whether detection or analysis is required very high, only two step_outs are handled properly measured color information is the most authentic and reliable.

Measurement is determined chromatic meter internal result, analysis is the international and national standards. In 1931 the National Commission on Illumination (CIE)for the analysis of colorimeter establish a series of color space standard of the visible spectrum . Basically for colorimeter analysis provides a theory standard and basis, CIE color space standard is CIE_XYZ, the establishment of this color space is the basis for standards_based visual ability of the observer to realize, that he responded to the standard people eye visible range of colors. In addition CIE_XYZ, CIE_xyY, CIE_Lab, CIE_Lch other standard color space, suitable for different industries and products.


Currently colorimeter is commonly used built_in color space CIE Lab color space, the color space to represent the color of the lightness L value, a value represents the value of the color red and green, b value represents the value of the color blue and yellow.

CIE Lab is mainly defined of really product color different value, generally used for all types of colorimeter color to control change. Lab values of a single set of little practical significance, but can only through the Lab when compares two color difference value to judge the difference between them.Precision colorimeter can measure the Lab values of the object obtained by analyzing the difference between the two colors. Lab value through long_term observation of the results we find that when the difference between Lab values greater than 1:00 naked eye can clearly feel the presence of chromatic aberration. Now the industry to save time and improve productivity, are generally used a pre_set tolerance range, during the quality control sample measured as long as the tolerance range on qualified, whether the person is ineligible. So not only can control the color quality of the products while increasing efficiency. By using the Lab color space, our production control to achieve the data.

Factors of the affecting gloss paint

It mainly depends on the illuminating source and angle of observation, the instruments measurement is adopt  20 °, 60 °, 85 ° angle of illumination and detection signal. Different industries often use different angle measuring instruments.

Surface gloss measurement ink, paint, baked enamel coating, wood products surface gloss measurement; architectural decoration materials, marble, granite, vitrified tiles, ceramic tiles and other surface gloss measurement; plastic, paper and other surface gloss measurement; Other non-metallic surface gloss measurement.


Factors of the affecting gloss finish paint:
1)the deployment of paint, increasing the amount of curing agent, the gloss will rise;
2) If reducing the amount of curing agent, the gloss is reduced;
3) increasing the amount of thinner, paint good leveling, thin brush can be, gloss reduction;
4) reduce the amount of thinner, paint leveling poor, must be thick brush, gloss increased; 
5) coating thickness, high gloss; thin coating, low gloss. Whether high or low gloss substrates,Brush paint dumb smooth is matte effects, brush light finish is too light effects.

 Secondly, the luster has relation with the pigments and fillers . Pigment particle size is large, usually someextinction. Particle size is too small, high oil absorption of paint, but also has a certain luster affected. Some people talked about the impact of filler above, substantially all of the filler material will affect the gloss, but I have seen ultrafine barium sulfate , does not substantially affect on the gloss, may even increase the gloss in thecase of an appropriate amount to add.

 Last, the impact of the dispersant influence is very large. If it is paint, must take into account the impact of the dispersant. Done related tests, the same formula, using different dispersants, a glossy 80 Another over 40. This is because the use of inappropriate dispersant, pigment will flocculation, the particles will be coarse, affect the gloss is inevitable.


2015年12月7日星期一

Rockwell hardness tester are advantages and disadvantages

Rockwell hardness tester advantages are:
1. because Rockwell hardness tester have a hard and two soft head, it is adapted to test a variety of different hard materials, there is no pressure head deformation;
2. small indentation, not to hurt the surface;
3. rapid operation, immediately obtained data, high production efficiency, suitable for mass production of the finished product testing.


 Rockwell hardness tester disadvantages are:
With different hardness level measured hardness value cannot unify ,can not be compared. Rockwell hardness value on the provisions of the production in the most used is A-class, B-class and C-class, namely the HRA, HRB and HRC, and among which the most commonly HRC. Because Rockwell hardness tester is the indentation depth t pouch as an index measure hardness values. At the same hardness level, the more hard metal indentation depth t is smaller, the more flexible the t greater. If directly with the size of the t as indicators, there will be a small hard metal t value and hardness values, the t value of soft metal hardness value is big to the phenomenon of large, this and brinell hardness value represented by the hardness of the concept of size, also do not match the habits of people. For this reason, only a last resort to take measures, namely with the selected constant minus the t values to mark its difference Rockwell hardness values. This constant provision of 0.2mm and 0.26mm. Rockwell hardness of the indenter divided in two soft and hard. Hard by the apex angle of 120 ° diamond cone into the system, suitable for measuring harder hardening steel and other metal materials; soft diameter 1/16 "or 1/8" steel ball, suitable for annealing Determination of steel, nonferrous metals and other softer material hardness values. Rockwell hardness of the applied load is tested according to hard and soft metal itself differently ranging provisions with different indenter and the applied loads with different titles appeared in a variety of Rockwell hardness level.

2015年11月29日星期日

What is the difference of the vanceometer to test a variety of different angles


Vanceometer is designed to measure a variety of coating a surface gloss, such as ceramics, paints, inks, plastics, marble, aluminum, metal and other material surface gloss. Is a product surface gloss control instrument. In general the test, you can choose 40 °, 60 ° and 85 °angle. Do you know these three angle test has any difference? We have to choose what kind of angle can be most suitable for our use?
The Gloss (Universal angle): 60 °
60 ° is applied to all surfaces measurement angle. It is also used as a low-gloss 85 °, high-gloss 40 °is reference angle of the measure surface.

Low Gloss: 85 °
In order to improve the resolution of lowgloss surface. Available 85 ° gloss measurement, when measured with a 60 ° surface gloss values below 10GU, recommended to use 85 ° angle measurement.

When using the 85 ° gloss measurement of different texture or slightly uneven surface, the need for multi-point measurements averaged.

High Gloss: 40 °
40 ° measuring angle can improve the resolution of a highgloss surface. When measured with a 60 ° higher than the object surface brightness value 70GU, it recommended to use 40 ° angle measurement.

40 ° angle (light path) of the surface haze phenomenon is very sensitive. Because the haze is peculiar phenomenon of  high-gloss surface.

2015年11月22日星期日

The features of Colorimeter


1. The automatic comparison of the model with the color difference between the seized goods, the output CIE_Lab three sets of data and colorimetric after △ E, △ L, △ a, △ b four sets of color data, providing color reference solution.

2. With a single sample and two measurement modes, to meet the needs of different places measurements, simple operation, measurement precision.

3. The instrument is portable. Battery and external power supply two power supply, convenient and practical.

4. Equipped with USB expansion interface can be connected to the computer display. Colorimeter, widely used in the field with color management of plastic , printing, ink painting, textile and apparel industries.


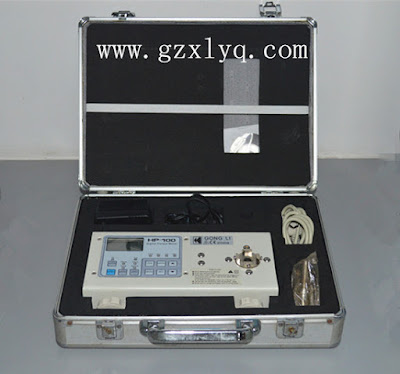
Torque tester


HC―NJ Static torque tester applicable to many kinds torsional test and test for adjusting the to

rsional destroy parts. Mainly use for all kinds of electric,pneumatic torque approved,torque scre

wdriver , screwdriver,torque wrench and a variety of tighten force instruments and products,Wid

ely use in electrical manufacturing , machinery manufacturing,automotive light industry and prof

essional research and testing industry.
★★★★★★★★★★★★★★★★★★★★★★★★★★★
Feature
1.LED double figures with backlit display.
2.USD data interface,support hot-plug.
3.Set the max and min deviation,and free to select the alarm mode within limits and external limit.
4.Three kind of units N.m, kgf.cm , lbf.iN can be free conversion,and also can automatic identify twist direction.
5.With peak keeping function,the peak automatically discharge and time discharge can be set freely.
6.It can permanently store 10groups test reports and automatically calculate out the peak,valley,average and etc in the test report
7.The power―saving function shutdown automatically whiles no operation and automatically backlight.
8.Use the specified software on the PC can store,deliver,review and print the test curve data.


2015年11月15日星期日

Plastic testing should have the basic instrumentation

Plastics (including plastic products, plastic raw materials, particles) which are necessary testing equipment has it? Let us enumerate some of the commonly used plastic testing instruments, (for reference)
♠♣♦♣♠♦♣♠♦♠♣♦♣♠♦♣♠♦♠♣♦♣♠♦♣♠♦♠♣♦♣♠♦♣♠♦♠♣♦♣♠♦♣♠♦♠♣♦♣♠♦♣♠♦♠♣♦♣♠♦♣♠♦♠♣♦♣♠♦
1.Melt flow rate tester: for the determination of various plastics, resin melt flow rate MFR value when the viscous flow state, both suitable for high melting temperature polycarbonate, poly aromatic sulfone, fluorine plastic, nylon and other engineering plastics, are also suitable for polyethylene (PE), polystyrene (PS), polypropylene (PP), ABS resin, polyoxymethylene (POM), polycarbonate (PC) resin, a low melting temperature plastic test . Meet the standards: ISO 1133-1997, ASTM D1238-04C, GB / T3682-2000
◆♦◆♦◆♦◆♦◆♦◆♦◆♦◆♦◆♦◆♦◆♦◆♦◆♦◆♦◆♦◆♦◆♦◆♦◆♦◆♦◆♦◆♦◆♦◆♦◆♦◆♦◆♦
2.Charpy (Izod) impact tester: for the determination of plastic toughness, and impact resistance of the instrument 
3. Densitometer: for testing the density of plastic.
4. HTD&vicat softening point temperature tester: Softening point test for plastics.
5.Electronic universal testing machine: for physical performance testing of plastics, such as: tensile strength, flexural strength, elongation, etc.
6.Low temperature brittleness tester: impact test for the detection of plastics at low temperatures.
7.Dumbbell sample milling machine: a standard sample used for the production of plastics (injection molding machine can also be completed)
●★●★●★●●★●★●★●●★●★●★●●★●★●★●●★●★●★●●★●★●★●
These are plastic testing should have the basic instrumentation, more product information and detailed technical data, please visit the company website  www.gzxlyq.com or contact us Buyers

2015年11月6日星期五

ETB-068 Vancemeter

Product specification

ETB -068 series mirror, its gloss measurement instrument technology parameters are completely accord with national standard GB/T9754-88 GB/T9966.5 , international standard of ISO2813, each index reaches the national JJG696-2002 (mirror glossiness instrument calibration procedures) level of job of requirements.
♦ . ♦ .  ♦ . ♦ . ♦ . ♦ . ♦ . ♦ . ♦ . ♦ . ♦ . ♦ . ♦ . ♦ . ♦ . ♦ . ♦ . 

Scope of application

Paint, ink, coating, wood surface gloss measurement; Building decoration materials, marble, granite, polishing brick, ceramic brick surface gloss measurement; Plastic, paper and other surface gloss measurement, Other nonmetal material surface gloss measurement.
♦ . ♦ .  ♦ . ♦ . ♦ . ♦ . ♦ . ♦ . ♦ . ♦ . ♦ . ♦ . ♦ . ♦ . ♦ . ♦ . ♦ . 


Instrument characteristics

Fine, lightly appearance, easy to carry
The intelligent design, one-touch operation,easy to use
Various angles, any choice
Long-life light, no replacement
Measurement accuracy, repeatability
LCD digital display
Operating process has hum
Has the power supply voltage instruction function
Random attach a charger,two rechargeable batteries
Has the function of automatic shutdown
Technical parameters:
Testing range:0-200Gs
Stability:±0.4Gs/Min
Values error:±0.2Gs
Power:9v
Angle projection:20°  60°  85°
Environmental temperature:0-40degree
Relative humidity: Don't exceed 85%
Standard plate size:95×40MM